If you have services in your home as in my case, your company will probably give you a dynamic public IP, so it is a hassle to have to be changing by hand the IP where your domain points every time your company changes the IP, so let’s see how to configure our router with OpenWRT with Cloudflare as DNS in a very simple way.
List of routers that I recommended:
Cloudflare Token
First of all we will need a cloudflare token, we can get it from here https://dash.cloudflare.com/profile/api-tokens with our account.
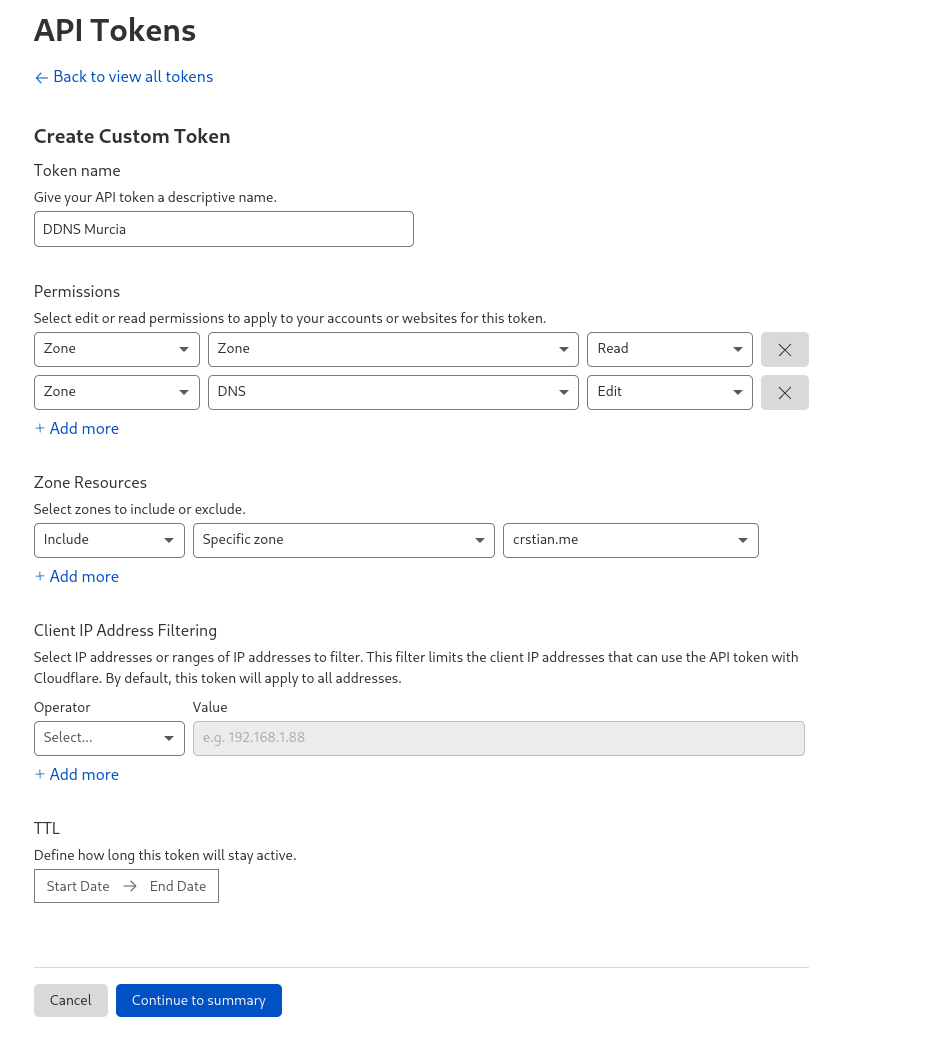
Create a new token with this configuration:
Zone, Zone: Read
Zone, DNS: Edit

Configure OpenWRT
Now we need to install the following packages (in my case via shell but it can also be done from Luci):
For OpenWRT 19.07 we need to install ddns-scripts_cloudflare.com-v4 For OpenWRT 20.02 or higher the package is ddns-scripts-cloudflare.
For OpenWRT 20.02 or higher the package is ddns-scripts-cloudflare.
opkg update
opkg install ddns-scripts-cloudflare luci-app-ddns
opkg install wget ca-certificates
opkg install curl ca-bundle
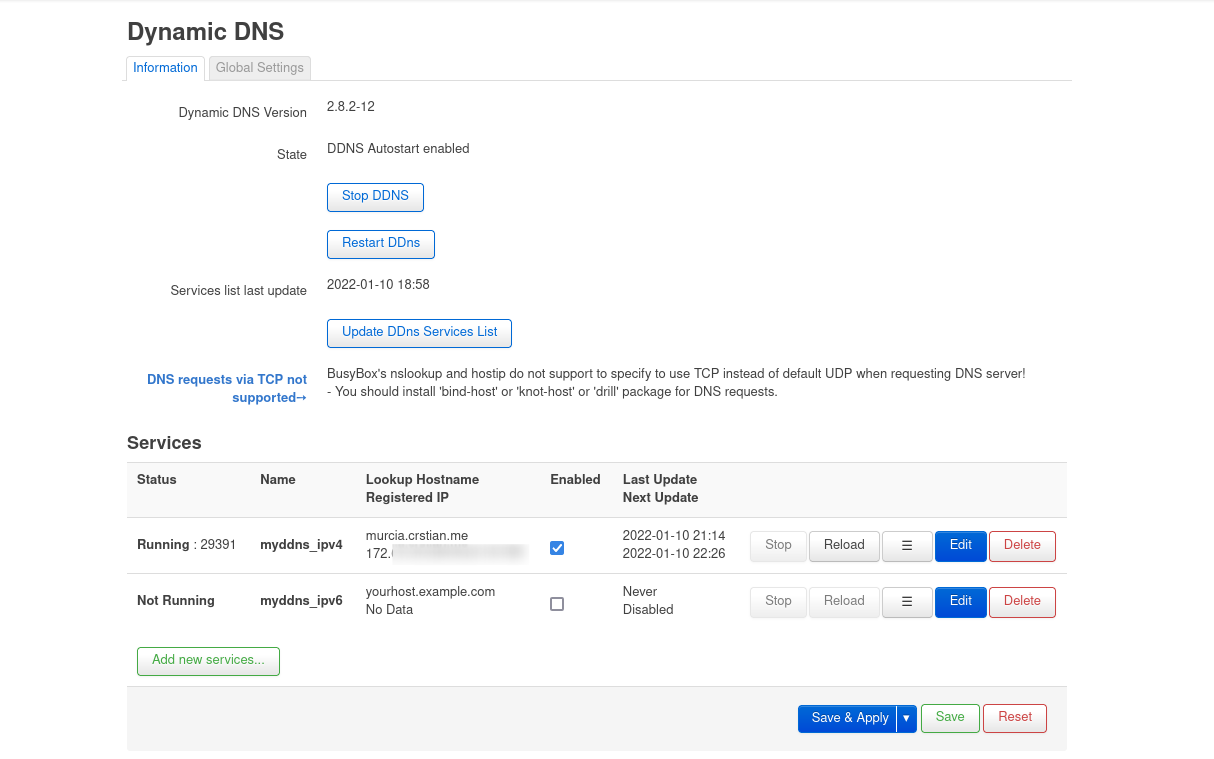
Once everything is installed we go to the router IP in the browser Services -> Dynamic DNS.
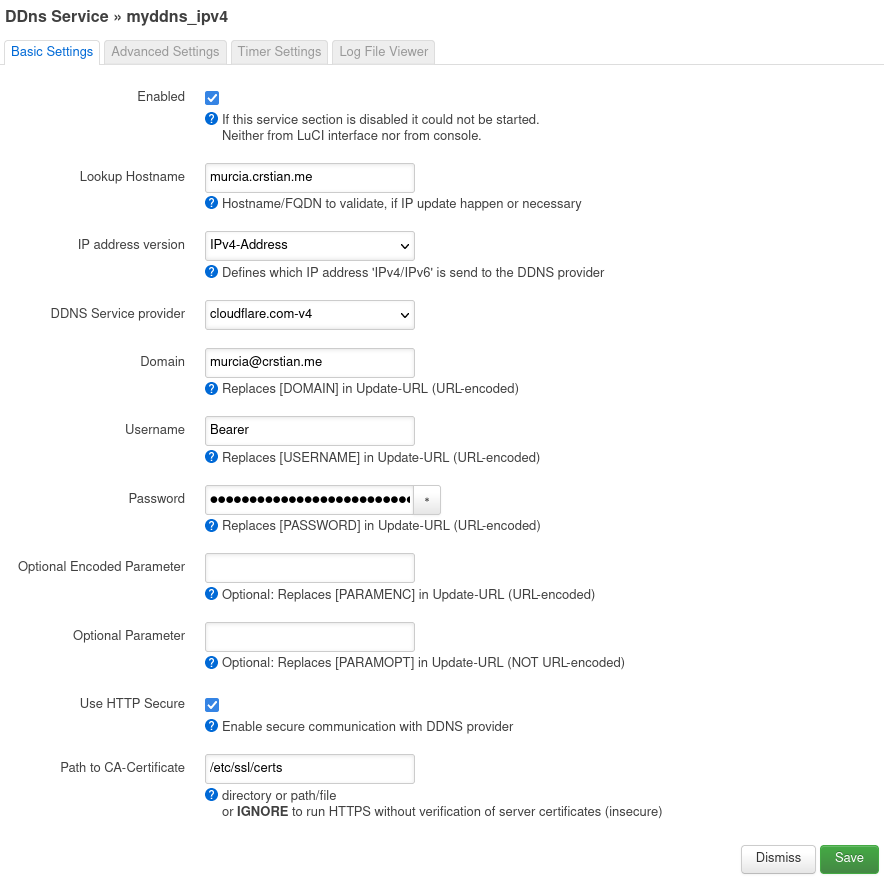
Edit the IPv4:
- Select DDNS Service provider cloudflare.com-v4.
- In Lookup Hostname we place our subdomain or domain for example in my case murcia.crstian.me, in Domain the same but in this format murcia@crstian.me
- In username Bearer and in password our cloudflare token.

Once this is done, click on Save and Apply.
Testing
To see that it is working we can see it in Services -> Dynamic DNS and we see how it takes our IP and if we go to the DNS of cloudflare we see that it has changed it.

